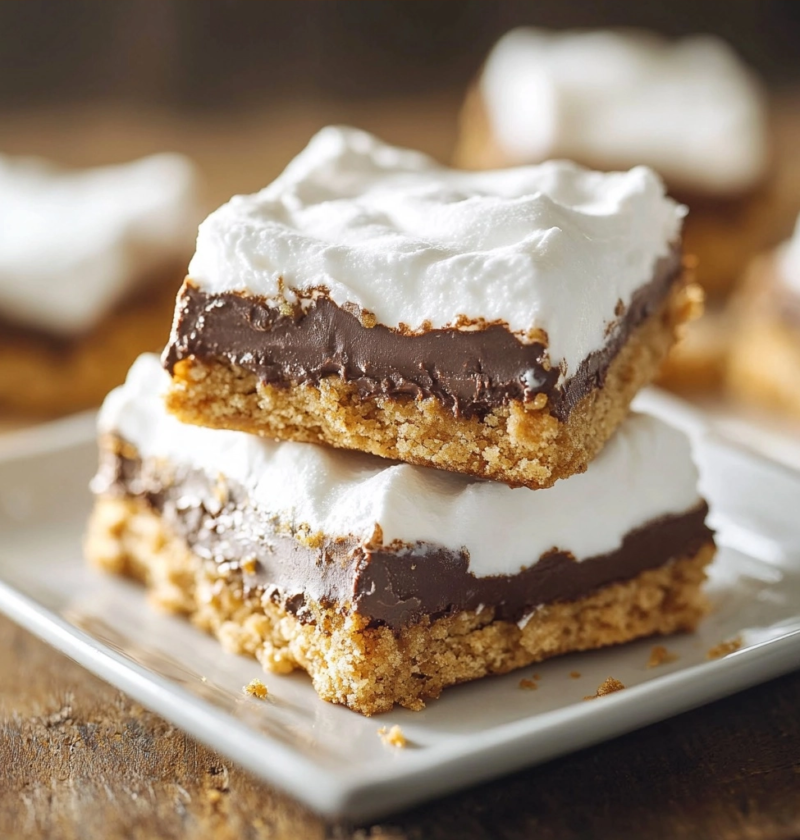
S’mores bars capture the nostalgic campfire spirit in a portable, customizable form that brings comfort to your own kitchen. This easy dessert features a tender chocolate and peanut butter cookie base, topped with gooey melted chocolate and toasted marshmallow creme, resulting in a rich treat that satisfies any sweet tooth with minimal effort.
| Detail | Information |
|---|---|
| Prep Time | 20 minutes |
| Cook Time | 30 minutes |
| Total Time | 50 minutes |
| Servings | 12 to 16 bars |
| Difficulty | Easy |
| Cuisine | American |
| Category | Desserts & Sweet Treats |
| Method | Baking |
Why This Recipe Works
This s’mores bars recipe is reliable because it perfectly balances sweet and salty notes while keeping the texture perfectly chewy without being gummy. The combination of graham cracker crumbs in the dough adds a subtle crunch and nuttiness that mimics the crust of a traditional campfire treat. By using a specific layering technique with a separate top cookie layer, you ensure a uniform texture throughout the bar rather than a soggy bottom. The method also simplifies portioning, allowing you to cut neat squares after a brief chill.
The interplay between the chocolate bars, peanut butter, and marshmallow creme creates a deep, complex flavor profile that stands out from basic chocolate chip cookies. Because the recipe relies on standard pantry staples and a few simple pantry items, it is highly accessible for home cooks looking for a quick weeknight treat. The result is a dessert that feels indulgent but bakes in under an hour, making it perfect for spur-of-the-moment gatherings or last-minute potlucks.
This approach ensures that the chocolate remains melty and gooey rather than hard and dry, provided you follow the recommended cooling time. The specific ratio of butter to flour ensures the base is sturdy enough to hold the weight of the toppings without breaking apart. Ultimately, this recipe works because it translates the joy of roasting marshmallows into a durable, shareable dessert that remains delicious at room temperature.
Chef Tips for Perfect Results
Always use room temperature butter and egg to ensure the cookie dough mixes evenly and bakes into a smooth, uniform texture without air pockets.
- Use steady heat: Bake the bars in a preheated 350°F oven so the edges firm up quickly while the center stays soft and gooey.
- Line the pan correctly: Use two sheets of parchment paper for the flip technique, ensuring the edges overhang so you can lift the cooled layer out cleanly.
- Check doneness: Remove the bars from the oven when the top is golden brown but still slightly underbaked in the very center for a fudgy texture.
- Chill before slicing: Let the baked bars cool completely or refrigerate them for a few hours before cutting to prevent them from crumbling or sticking to the knife.
- Peanut butter spread: For a more intense peanut butter flavor and smoother layer, use a creamy peanut butter rather than a natural chunky variety.
- Chocolate placement: Lay the chocolate bars flat in the pan in a single layer to maximize the surface area for melting and coating the cookie.
Common Mistakes to Avoid
One of the biggest errors home cooks make is removing the bars from the oven too early, which leads to a dense, cakey texture that does not hold the toppings well.
| Mistake | Why It Happens | How to Fix It |
|---|---|---|
| Overbaking the base | Baking too long causes the butter to separate and the cookie to become dry and crumbly. | Remove from the oven when the edges are light golden brown and the center feels barely set. |
| Skipping the chill | Trying to cut the bars while they are warm makes them sticky and prone to falling apart. | Let the bars cool completely at room temperature or chill them in the refrigerator for at least 2 hours. |
| Messy parchment removal | Lifting the parchment layer too roughly can tear the top cookie crust or leave bits of paper behind. | Loosen the sides of the parchment with a spatula before lifting to ensure a clean release. |
| Uneven chocolate topping | Not spreading the chocolate bars flat or using broken shards can result in pockets that melt unevenly. | Press the chocolate bars firmly into a single, even layer before adding the marshmallow creme. |
| Using cold ingredients | Ice-cold butter and egg create a dense dough that lacks air pockets and spreads too little. | Let the butter soften and the egg come to room temperature for 30 minutes before mixing. |
| Ignoring salt levels | Too little salt makes the dessert taste one-note sweet while too much creates a bitter aftertaste. | Stick to the recipe measurements and taste the batter lightly before baking. |
Variations and Substitutions
Customizing this recipe is simple, allowing you to tailor the flavors to your personal preference or dietary needs without altering the basic baking structure.
| Ingredient or Element | Substitution or Variation | Impact on Flavor or Texture |
|---|---|---|
| Chocolate Bars | Substitute white chocolate or a mix of milk and dark chocolate. | Creates a sweeter, creamier flavor profile with a smoother mouthfeel. |
| Peanut Butter | Swap for sunflower seed butter to make the recipe nut-free. | Maintains the salty flavor but removes potential allergens for a wider audience. |
| Graham Crackers | Use digestive biscuits or shortbread cookies instead of graham crackers. | Changes the sweetness and introduces a buttery or less sweet base flavor. |
| Marshmallow Creme | Top with a layer of toasted mini marshmallows under the broiler after baking. | Provides an additional layer of fluffiness and a toasted, crispy exterior. |
| Flour | Replace with all-purpose gluten-free flour blend. | Alters the texture slightly but allows celiacs to enjoy the treat without cross-contamination. |
| Butter | Use coconut oil blended with a little oil for dairy-free baking. | Introduces a subtle coconut aroma and a denser, richer crumb. |
Serving Suggestions and Pairings
These bars serve well as a standalone dessert or as part of a larger spread at parties.
- Serve with a tall glass of cold whole milk for a classic texture contrast.
- Pair with strong coffee to cut through the richness of the chocolate and peanut butter.
- Enjoy with a scoop of vanilla bean ice cream for a warm, cold temperature contrast.
- Top with a dollop of homemade whipped cream and a cherry for a fancy presentation.
- Include in a school lunchbox for an extra special treat.
- Add to a holiday dessert table for a twist on traditional bar cookies.
- Pair with a berry compote to balance the heavy sweetness.
- Store in the refrigerator and serve chilled for a firmer, more firm-set texture.
For a complete dessert experience, serve these s’mores bars alongside a scoop of strawberry ice cream and a drizzle of raspberry sauce.
Make Ahead Options
You can definitely prepare parts of this recipe in advance to save time on the day you plan to serve them. The cookie dough can be mixed and chilled in the refrigerator for up to 24 hours before baking, which often results in even better texture due to the flour hydrating better. Once baked, the full bars can be stored in the refrigerator for up to five days, making them an excellent make-ahead treat for busy weekends.
For longer-term storage, you can freeze the completely cooled and cut bars in a freezer-safe container for up to three months. To serve frozen bars, simply leave them at room temperature for an hour or microwave them for 10 to 15 seconds to soften the edges before serving.
Storage and Reheating
Proper storage is essential to maintain the freshness and prevent the cookies from becoming stale.
| Method | Duration | Instructions |
|---|---|---|
| Room Temperature | 2 to 3 hours | Store in an airtight container at room temperature. Do not exceed three hours as the marshmallow creme may become too soft and sticky. |
| Refrigerator | 5 to 7 days | Place bars in an airtight container lined with parchment paper. This keeps the texture firm and prevents absorption of other odors. |
| Freezer | 2 to 3 months | Wrap individual bars tightly in plastic wrap or place in a freezer-safe bag with parchment between layers to prevent sticking. |
| Reheating | Heat in a preheated 300°F oven for 10 minutes or microwave for 15-second intervals until heated through. | |
| Make Ahead | Up to 24 hours | Prepare the dough the night before and keep it chilled until ready to press into the pan. |
Nutritional Information
Approximate values are based on one serving and may vary depending on exact ingredients and portion size.
| Nutrient | Amount per Serving |
|---|---|
| Calories | 320 |
| Protein | 4g |
| Fat | 20g |
| Saturated Fat | 12g |
| Carbohydrates | 34g |
| Fiber | 1g |
| Sugar | 22g |
| Sodium | 180mg |
Frequently Asked Questions
Can I substitute peanut butter for chocolate?
While the recipe is designed specifically for a chocolate and peanut butter combination, you could theoretically reverse the layers, though the texture would change significantly. A peanut butter base with a marshmallow top might be too soft to hold together without a firmer crumb structure. It is best to stick to the original recipe for the best structural integrity and flavor balance.
How do I know when the s’mores bars are done baking?
The bars are done when the top is golden brown and the edges appear set. You can also gently shake the pan; the center should barely wiggle, if at all. Letting them cool completely is crucial because the bars will continue to set as they cool.
Why did my cookie layer fall apart when I flipped it?
This usually happens if the dough was not pressed down firmly enough or if the butter was too warm. Ensure the dough is chilled in the fridge for 30 minutes before pressing into the pan, and press firmly with the bottom of a glass to ensure it is dense.
Can I use marshmallows instead of marshmallow creme?
You can use large marshmallows, but they will not melt into a smooth layer as easily as the creme. If you use marshmallows, you would need to spread them thinly and melt them under a broiler after baking to get a similar gooey texture.
Are these s’mores bars gluten free?
They are not naturally gluten free because the recipe calls for all-purpose flour. To make them gluten free, you must substitute the flour with a 1:1 gluten-free baking blend.
How long can I leave them out of the fridge?
You can leave them out at room temperature for up to three hours if it is not too hot. After that, the marshmallow creme may become sticky or the chocolate may start to sweat, so it is best to refrigerate them.
Conclusion
This easy s’mores bars recipe provides a perfect blend of chewy cookie, rich chocolate, and sweet marshmallow that brings the essence of campfires right to your oven. By following these simple steps and tips, you can achieve bakery-quality results in your own kitchen without the hassle of outdoor fires. These treats are an ideal solution for anyone craving that classic campfire taste but needing a dessert that is easy to assemble and share.
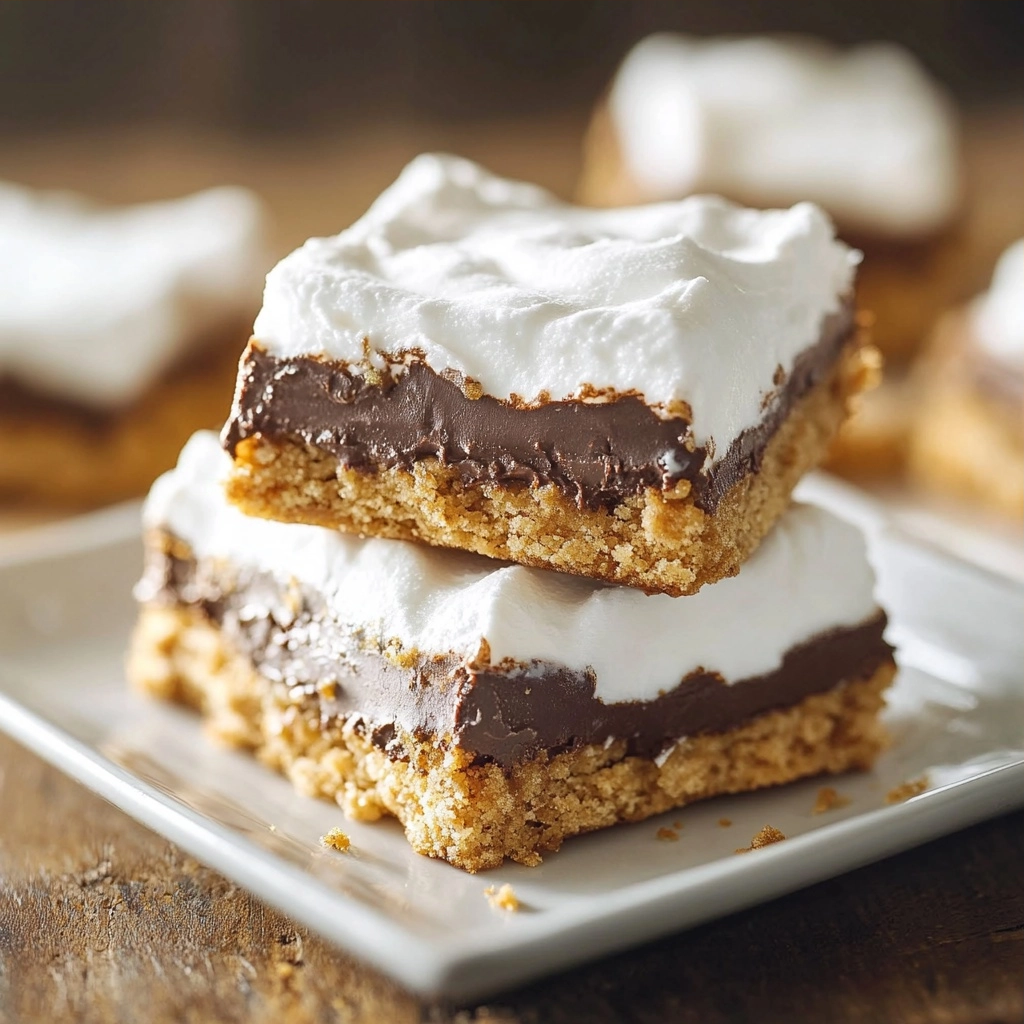
Easy S'mores Bars Recipe for Family Desserts
Ingredients
Method
- Preheat oven to 350°F (175°C)
- Line 9x13-inch baking pan with parchment paper
- Combine graham cracker crumbs, butter, brown sugar, peanut butter, vanilla, and salt in bowl
- Press mixture firmly into prepared pan
- Bake for 10-12 minutes until golden
- Evenly spread melted chocolate over hot base
- Let cool until chocolate sets
- Spread toasted marshmallow creme over chocolate layer
- Chill 30 minutes before cutting into bars
Nutrition
Notes
Test chocolate layer by inserting toothpick - it should come out barely clean
Marshmallow creme is optional but enhances gooey texture
Store in airtight container at room temp for 4 days