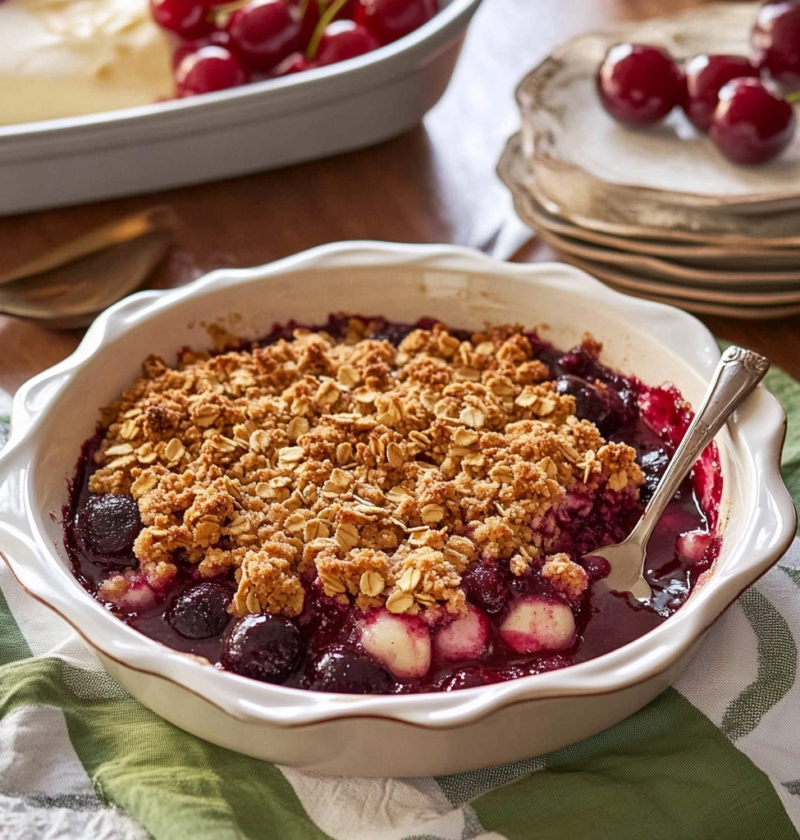
This classic Cherry Crisp delivers a perfect balance of tender, juicy fruit and a buttery, crunchy oat topping. It is a simple yet impressive dessert that captures the essence of fresh summer produce.
| Detail | Information |
|---|---|
| Prep Time | 15 minutes |
| Cook Time | 50 minutes |
| Total Time | 65 minutes |
| Servings | 8 servings |
| Difficulty | Easy |
| Cuisine | American |
| Category | Desserts & Sweet Treats |
| Method | Baking |
Why This Recipe Works
This Cherry Crisp recipe works because it relies on the fundamental chemistry of fruit baking to create a self-sustaining, flavorful dessert without requiring complex techniques. The combination of fresh cherries, granulated sugar, and lemon juice naturally breaks down during baking to create a thick, glossy filling that clings to the fruit halves. Simultaneously, the topping utilizes a ratio of flour, oats, and brown sugar that caramelizes beautifully, providing a textural contrast to the soft fruit. The addition of cornstarch is crucial as it thickens the released juices, preventing a watery mess and ensuring the crisp maintains its structural integrity even when served warm. Furthermore, the use of vanilla and almond extracts elevates the flavor profile, adding depth that complements the natural tartness of the cherries. The method of squeezing the topping into clumps with your fingers ensures that the butter coats the dry ingredients evenly, creating a crumb that is neither powdery nor rock-hard.
The reliability of this recipe also stems from its forgiving nature regarding ingredient substitutions. While fresh cherries are ideal, the recipe is robust enough to handle slight variations in ripeness, provided the sugar balance is adjusted slightly. The baking time is generous, allowing the fruit to cook through completely while the topping browns to a golden perfection. This balance of time and temperature ensures that the final result is a comforting, warm dessert that feels homemade and nostalgic. By allowing the filling to stand for ten minutes before baking, the cornstarch has time to hydrate, which guarantees a set filling rather than a runny one. This attention to detail transforms simple ingredients into a cohesive, delicious dish that is perfect for any occasion.
Ultimately, the success of this Cherry Crisp lies in the interplay between the sweet, tart fruit and the rich, nutty topping. The recipe is designed to be accessible to home cooks of all skill levels, requiring only basic mixing and baking skills. The result is a dessert that is visually appealing, with the vibrant red cherries peeking through the golden crust, and incredibly satisfying to eat. It is a testament to how the right combination of pantry staples can create a memorable culinary experience.
Chef Tips for Perfect Results
Chilling the topping before baking is essential for achieving the best texture and structure for your Cherry Crisp.
- Chill the topping mixture: Refrigerating the flour, oats, and butter mixture for at least 30 minutes before baking allows the ingredients to bind together. This prevents the topping from spreading too thin and ensures it forms large, cohesive clumps rather than a flat, sandy layer.
- Use room temperature butter: Ensure your butter is melted but not hot. If the butter is too hot, it will melt the oats and flour into a paste rather than coating them in a crumbly layer. Letting the butter cool slightly after melting is a key step for a light, flaky topping.
- Don’t rush the filling stand time: Allowing the pitted cherries to sit with the sugar and cornstarch for ten minutes before baking is critical. This step lets the fruit release its natural juices and allows the cornstarch to hydrate, resulting in a thick, jam-like consistency rather than a watery sauce.
- Check the oven halfway through: Keep an eye on the crisp during the last 10 minutes of baking. If the topping is browning too quickly, tent the dish loosely with aluminum foil to protect it while the fruit continues to cook.
- Use a 9×9 inch pan for depth: While a 10-inch skillet works, a 9×9 inch baking dish allows the fruit to be slightly deeper. This helps the fruit cook evenly and prevents the topping from burning before the fruit is tender.
- Let it cool before serving: Allowing the Cherry Crisp to rest for about 15 minutes after removing it from the oven is vital. This resting period lets the filling set completely and allows the flavors to meld together, making it easier to scoop and serve without making a mess.
Common Mistakes to Avoid
Avoiding common pitfalls is the key to mastering this dessert and ensuring a consistently delicious result.
| Mistake | Why It Happens | How to Fix It |
|---|---|---|
| Watery filling | Not letting the fruit sit with the sugar and cornstarch long enough before baking. | Let the cherry mixture stand for at least 10 minutes to allow the juices to release and the cornstarch to hydrate. |
| Soggy topping | Adding the melted butter to the dry ingredients while they are still warm or using too much butter. | Ensure the butter is cool and stir it in quickly. Refrigerating the topping mixture before baking helps maintain the crumb structure. |
| Burnt topping | Baking at too high a temperature or leaving the dish in the oven too long. | Bake at 350°F and tent the dish with foil during the last 10 minutes if the top is browning too quickly. |
| Undercooked fruit | Removing the crisp from the oven too early or using a pan that is too shallow. | Bake for the full 45 to 50 minutes and use a 9×9 inch pan to ensure the fruit cooks through evenly. |
| Clumpy, hard topping | Squeezing the topping too hard or using cold butter that doesn’t coat the flour evenly. | Squeeze the mixture gently with your fingers to form clumps, and use melted butter that has cooled slightly. |
| Uneven baking | Not arranging the cherries evenly in the dish or using a pan with uneven heating. | Toss the cherries thoroughly with the sugar mixture and spread them in a single, even layer in the prepared dish. |
Variations and Substitutions
Customizing this Cherry Crisp allows you to adapt the recipe to your dietary needs and flavor preferences.
| Ingredient or Element | Substitution or Variation | Impact on Flavor or Texture |
|---|---|---|
| Fresh Cherries | Frozen cherries (thawed and drained) | May result in a slightly thinner filling due to excess water, requiring an extra teaspoon of cornstarch. |
| Almond Extract | Amaretto liqueur or additional vanilla extract | Amaretto adds a nutty, boozy depth, while extra vanilla enhances the sweetness and fruitiness. |
| All-Purpose Flour | Gluten-free all-purpose flour blend | Ensures the crisp is safe for those with gluten sensitivities while maintaining a similar texture. |
| Butter | Coconut oil or vegan butter | Coconut oil adds a subtle tropical flavor, while vegan butter keeps the flavor neutral and plant-based. |
| Oats | Coarsely chopped pecans or walnuts | Replacing oats with nuts creates a crunchier, more decadent topping with a richer, nutty profile. |
| Lemon Juice | Lime juice or orange juice | Lime adds a sharper, more acidic contrast, while orange juice provides a sweeter, citrusy brightness. |
| Brown Sugar | Maple syrup or honey | Maple syrup adds a distinct woodsy flavor, while honey provides a floral sweetness and a darker color. |
Serving Suggestions and Pairings
Enhance your Cherry Crisp experience with these thoughtful serving ideas and pairings.
- Serve warm with a generous scoop of vanilla bean ice cream to contrast the warm fruit with cold creaminess.
- Top with a dollop of unsweetened whipped cream or Greek yogurt for a lighter, tangier finish.
- Pair with a strong, hot cup of black coffee or a robust espresso to cut through the sweetness.
- Accompany with a side of fresh mint leaves for a pop of color and a refreshing aroma.
- Enjoy alongside a crisp green salad with a balsamic vinaigrette to balance the richness of the dessert.
- Drizzle with a simple honey or maple glaze just before serving for an extra layer of sweetness.
- Pair with a glass of dry sparkling wine or a light white wine like Sauvignon Blanc.
- Use the leftovers as a topping for oatmeal or yogurt parfaits for a quick breakfast treat.
For a complete meal, serve this Cherry Crisp alongside a savory grilled chicken breast or a fresh spinach salad with feta cheese. The sweetness of the fruit provides a perfect palate cleanser after a savory main course, making it an ideal choice for summer barbecues or dinner parties.
Make Ahead Options
You can prepare parts of this Cherry Crisp ahead of time to save effort on the day you plan to serve it.
The crisp topping can be made up to two days in advance. Simply mix the dry ingredients, pour in the melted butter, and stir until crumbly. Store the mixture in an airtight container in the refrigerator. This allows the flour and oats to absorb the butter, resulting in larger, more cohesive clumps when baked. The fruit filling can also be prepared a day ahead. Toss the pitted cherries with the sugar, lemon juice, and cornstarch, and store them in the refrigerator in a sealed container. This resting period helps the fruit release its juices and the cornstarch to hydrate, ensuring a thick filling when baked. On the day of serving, simply assemble the dish with the prepared filling and topping and bake as directed.
If you need to bake the entire crisp in advance, you can assemble it fully and refrigerate it overnight. However, you will need to increase the baking time by about 10 to 15 minutes to ensure the fruit is heated through. When reheating refrigerated leftovers, cover the dish with foil to prevent the topping from drying out and bake at 350°F until warmed through. This method ensures that the dessert retains its warm, gooey texture without losing its crunch.
Storage and Reheating
Proper storage and reheating techniques will keep your Cherry Crisp fresh and delicious for days.
| Method | Duration | Instructions |
|---|---|---|
| Room Temperature | 2 hours | Do not leave the Cherry Crisp out at room temperature for more than two hours to prevent bacterial growth. |
| Refrigerator | 3 to 4 days | Store leftovers in an airtight container in the refrigerator. The topping may soften slightly, but the flavor remains excellent. |
| Freezer | 3 months | Freeze the cooled crisp in an airtight container. Thaw overnight in the refrigerator before reheating. |
| Reheating | 15 to 20 minutes | Preheat oven to 350°F. Cover the dish with foil and bake until heated through. For a crispy topping, uncover for the last 5 minutes. |
| Make Ahead | 2 days | Prepare the topping and filling separately and store them in the refrigerator. Assemble and bake just before serving. |
Nutritional Information
Approximate values are based on one serving and may vary depending on exact ingredients and portion size.
| Nutrient | Amount per Serving |
|---|---|
| Calories | 350 calories |
| Protein | 4 grams |
| Fat | 18 grams |
| Saturated Fat | 10 grams |
| Carbohydrates | 48 grams |
| Fiber | 4 grams |
| Sugar | 32 grams |
| Sodium | 180 milligrams |
Frequently Asked Questions
Can I use frozen cherries for this Cherry Crisp?
Yes, you can use frozen cherries, but you must thaw them completely and drain any excess liquid before mixing them with the sugar and cornstarch. The extra water from frozen fruit can make the filling too thin, so you may need to add an additional teaspoon of cornstarch to ensure the filling sets properly.
How do I know when the Cherry Crisp is done baking?
The Cherry Crisp is done when the fruit filling is bubbling vigorously around the edges and the topping is golden brown. You can also insert a toothpick into the center of the fruit; it should come out clean or with just a few moist crumbs attached. The juices should be thick and syrupy, not watery.
Can I make this Cherry Crisp gluten-free?
Absolutely. You can substitute the all-purpose flour with a gluten-free all-purpose flour blend that is designed for baking. Ensure the oats you use are certified gluten-free to avoid cross-contamination, as traditional oats are often processed in facilities that handle wheat.
How long can I store Cherry Crisp in the refrigerator?
You can store Cherry Crisp in the refrigerator for up to three to four days. Keep it in an airtight container to maintain freshness. While the topping may soften slightly after a day, the flavor remains delicious, and you can easily crisp it up again in the oven.
What is the best way to reheat Cherry Crisp?
The best way to reheat Cherry Crisp is in the oven. Preheat your oven to 350°F, cover the dish with foil to prevent the topping from drying out, and bake for about 15 to 20 minutes until heated through. If you prefer a crispy topping, uncover it for the last 5 minutes of baking.
Can I add other fruits to this Cherry Crisp?
Yes, this recipe is very versatile. You can mix in other fruits like sliced peaches, blueberries, or apples. Just be mindful of the ripeness and sugar content of the additional fruits, as some may release more liquid than cherries.
Conclusion
This Cherry Crisp recipe is a testament to the beauty of simple, high-quality ingredients coming together to create something truly special. The combination of sweet, tart cherries and a buttery, oat-crusted topping makes for a dessert that is both comforting and sophisticated. By following these detailed steps and tips, you can ensure a perfect result every time, whether you are a seasoned baker or a beginner in the kitchen. The ease of preparation and the incredible flavor make this a go-to recipe for family gatherings, summer picnics, or a cozy weeknight treat. Enjoy the warm, bubbly goodness of this classic dessert and share it with loved ones.
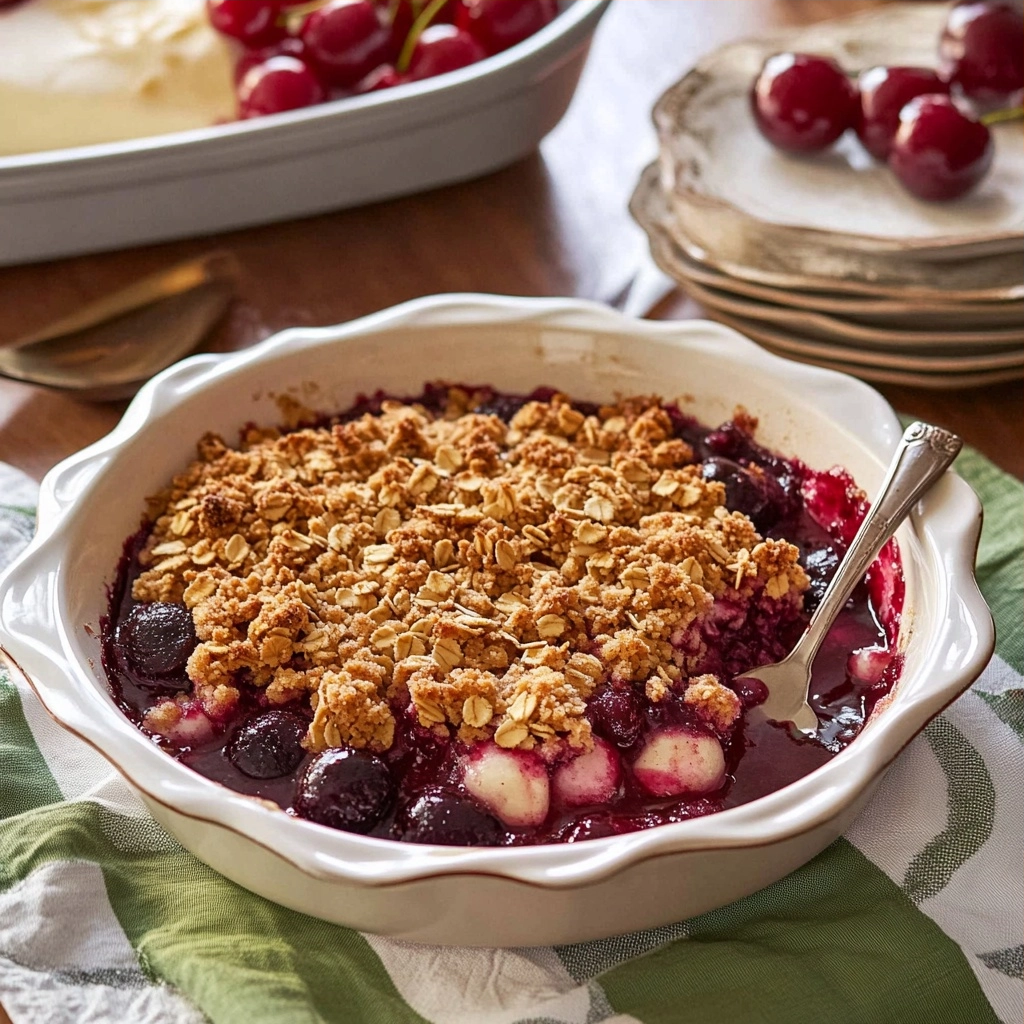
Easy Cherry Crisp Recipe for Summer Desserts
Ingredients
Method
- Preheat oven to 375°F (190°C)
- In a large bowl, combine cherries, granulated sugar, lemon juice, vanilla extract, and almond extract. Let the mixture stand for 10 minutes.
- Stir in flour and cornstarch to create the filling.
- In a separate bowl, mix oats, flour, brown sugar, cinnamon, and salt until combined.
- Add the cold butter and use your fingers to work it into the dry ingredients until a crumbly mixture forms.
- Spread the filling into an 8x8-inch baking dish and scatter the topping evenly over the fruit.
- Bake for 45 to 50 minutes, until the topping is golden and the juices are bubbling.
- Let the crisp cool slightly before serving.
Nutrition
Notes
For a variation, you can use a mix of cherries and peaches for a hybrid crisp.
Store leftovers in an airtight container at room temperature for up to two days or in the refrigerator for up to five days.