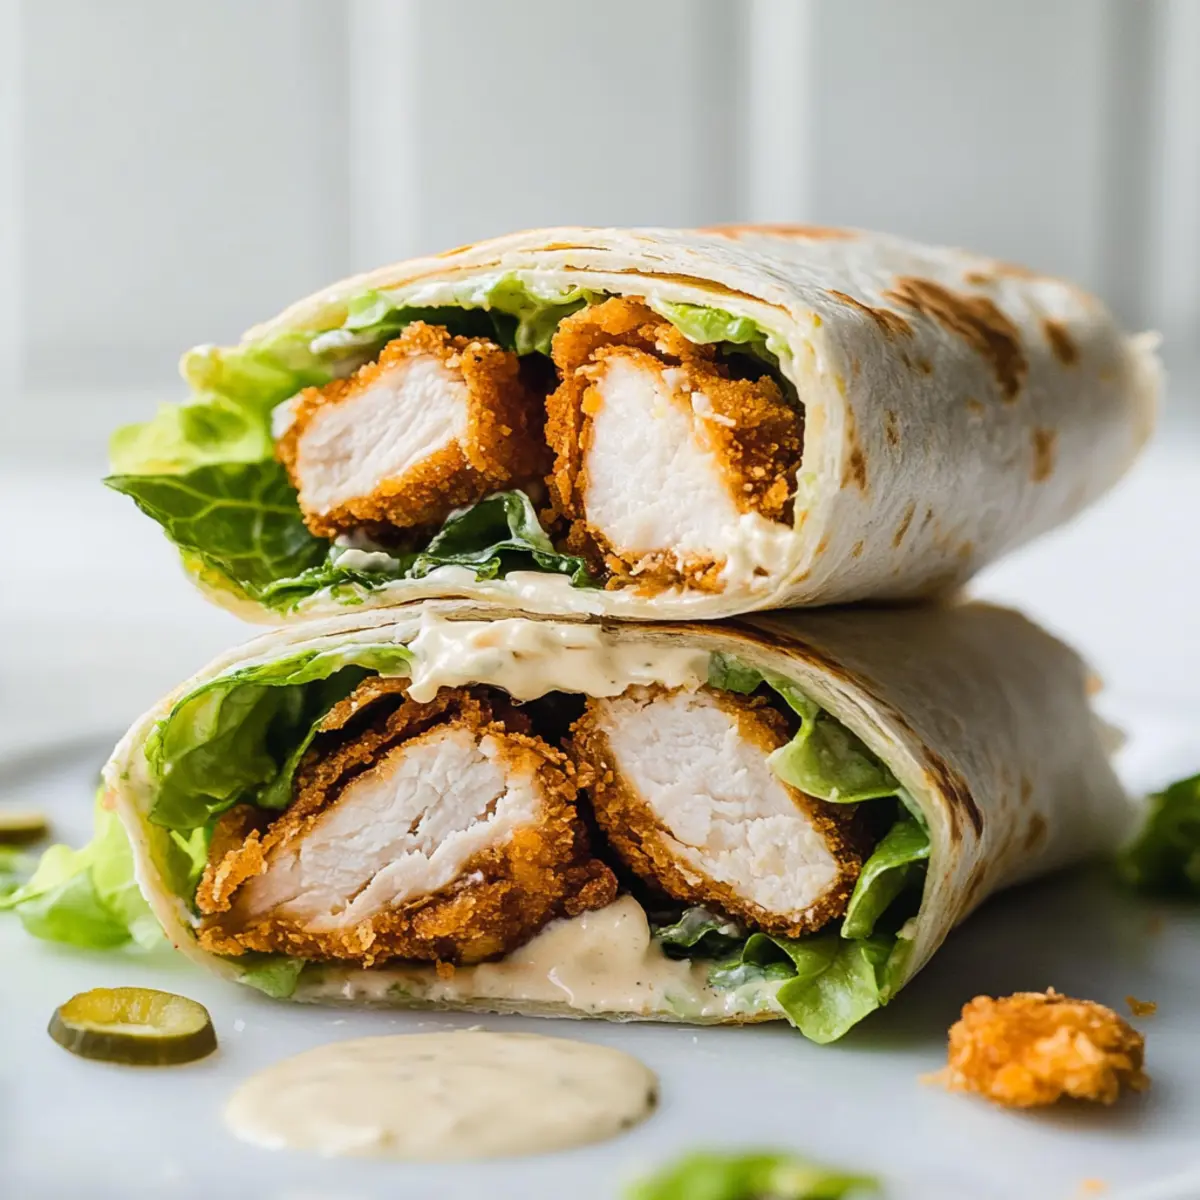
As I raced against the clock during a busy weekday, I stumbled upon a lifesaver that transformed my lunch hour: Chicken Caesar Wraps. This delightful creation beautifully marries the satisfying crunch of crispy chicken tenders with the creamy, savory essence of a classic Caesar salad, all wrapped in a soft tortilla. In just 30 minutes, you can whip up a quick lunch that’s not only delicious but also portable and customizable for every palate—whether you choose homemade or store-bought ingredients. Perfect for those tired of fast food, these wraps cater to both health-conscious eaters and flavor enthusiasts alike. Are you ready to elevate your lunch game with a twist on a timeless favorite?

Why are Chicken Caesar Wraps a Game-Changer?
Incredible Convenience: These wraps can be made in just 30 minutes, making them perfect for a quick weekday lunch.
Customization Galore: Whether you prefer homemade or store-bought chicken tenders and dressing, this recipe allows you to personalize it just how you like!
Fresh and Crunchy: The combination of crispy chicken and fresh romaine provides a satisfying crunch that will keep your taste buds happy.
Family-Friendly Fun: Kids and adults alike will love these flavorful wraps, making them an ideal choice for lunches and busy evenings.
Portable Delight: Wrapped up neatly, they’re easy to take on-the-go, perfect for picnics or casual get-togethers.
Looking for more inspiration? Check out our Creamy Chicken Enchilada Soup for another delicious meal that’s as comforting as it is quick!
Chicken Caesar Wraps Ingredients
For the Chicken
• Prepared Chicken Tenders – Use homemade or store-bought for convenience and flavor.
For the Dressing
• Caesar Dressing – Opt for homemade to elevate freshness, or grab your favorite store-bought version for a quicker option.
For the Wrap
• Large Burrito-sized Tortillas – These hold everything together, making your wraps easy to eat on-the-go.
• Romaine Lettuce – Adds a refreshing crunch; feel free to swap with other greens if desired.
• Shaved Parmesan Cheese – Boosts the classic Caesar flavor; grated cheese works as a suitable alternative.
Now that we have the essentials, let’s get ready to assemble your delicious Chicken Caesar Wraps!
Step‑by‑Step Instructions for Crunchy Chicken Caesar Wraps
Step 1: Prepare Chicken
If you’re using store-bought chicken tenders, preheat your oven according to package instructions and bake them until golden brown and crispy, usually around 20 minutes. For homemade chicken tenders, bread your chicken pieces and fry or bake them until they’re cooked through and crunchy, about 15-20 minutes. Let them cool slightly before assembling your delicious Chicken Caesar Wraps.
Step 2: Make Dressing
While the chicken is cooking, prepare your Caesar dressing. If you’re making it from scratch, whisk together mayonnaise, lemon juice, Dijon mustard, minced garlic, and grated Parmesan until smooth and creamy. Adjust seasoning with salt and pepper to taste. If you opted for store-bought dressing, simply measure it out and set it aside.
Step 3: Warm Tortillas
Next, warm your large burrito-sized tortillas to make them pliable. You can do this in the microwave for 15-30 seconds or in an oven preheated to 350°F for about 5 minutes. This step ensures that your tortillas will easily wrap around the fillings without tearing as you assemble your Chicken Caesar Wraps.
Step 4: Assemble Wraps
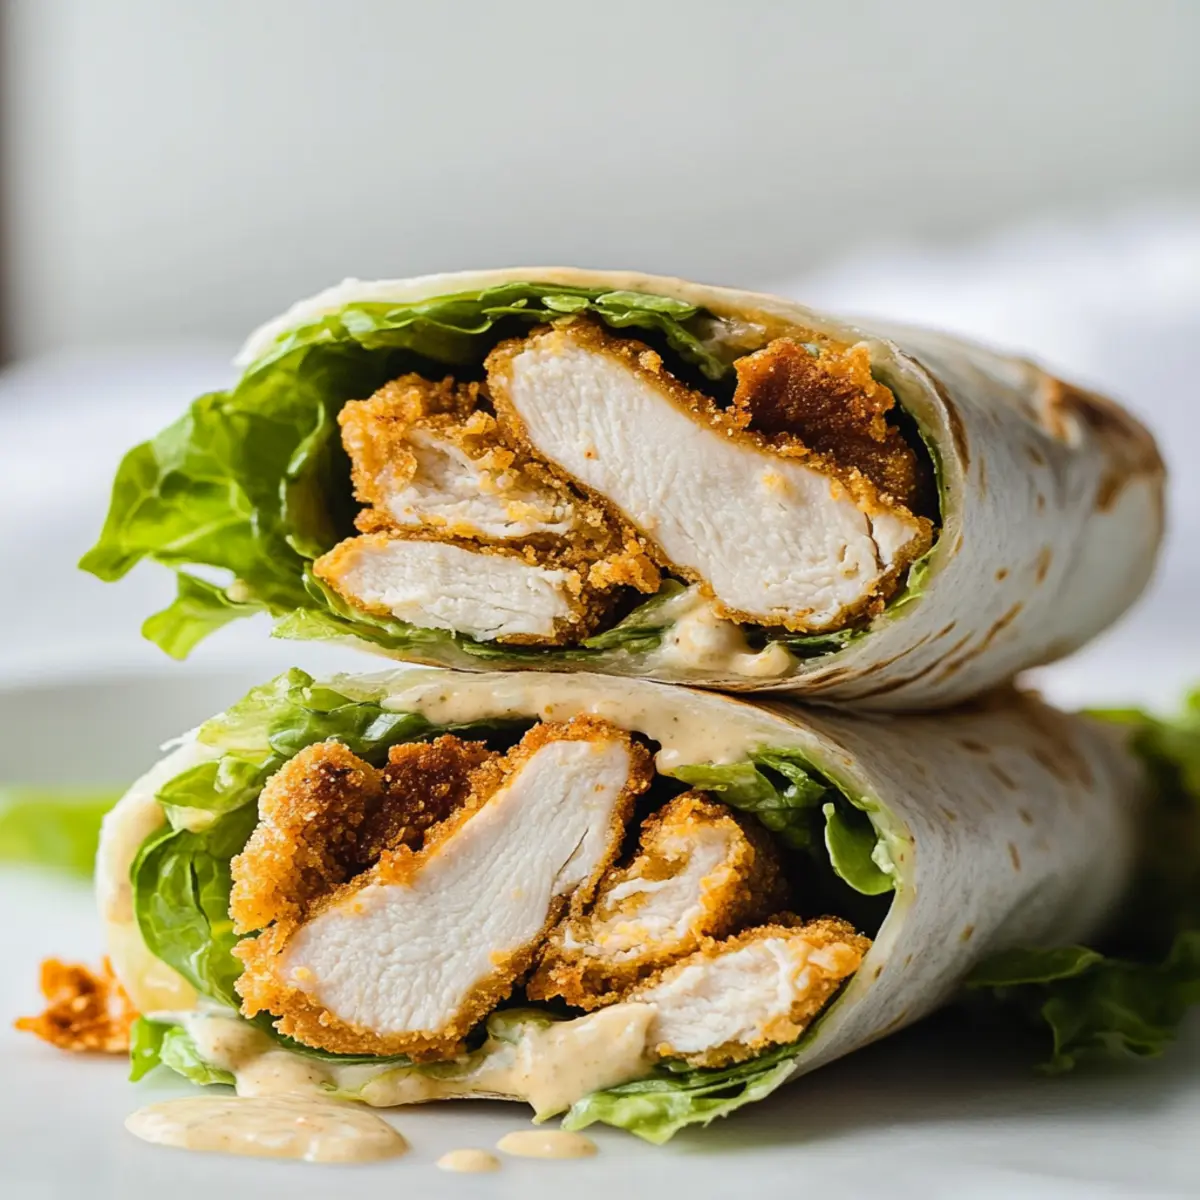
Now it’s time to put your Chicken Caesar Wraps together! On each warm tortilla, layer a generous handful of chopped romaine lettuce, 1-2 crispy chicken tenders, a sprinkle of shaved Parmesan cheese, and a drizzle of your creamy Caesar dressing. Make sure to distribute the ingredients evenly for maximum flavor in every bite.
Step 5: Wrap
To finish, fold in the sides of the tortilla and roll it up tightly from the bottom. Ensure your wrap is secure so all the delicious fillings stay inside. If desired, slice your wraps in half for easier handling. These Chicken Caesar Wraps are not only enticing to the eye but conveniently portable for those on-the-go lunches!
How to Store and Freeze Chicken Caesar Wraps
Fridge: Store your assembled Chicken Caesar Wraps in an airtight container in the refrigerator for up to 1 day for the best flavor and texture.
Freezer: If you want to freeze them, wrap each Chicken Caesar Wrap tightly in aluminum foil or plastic wrap, then place in a freezer-safe bag. They can be kept for up to 2 months.
Reheating: To reheat frozen wraps, thaw overnight in the fridge, then warm in the microwave for about 1-2 minutes, or until heated through.
Assembling Ahead: If making in advance, consider keeping the dressing separate until ready to serve to maintain the wraps’ crunchiness.
Expert Tips for Chicken Caesar Wraps
• Crispy Chicken Secret: Always ensure your chicken tenders are fully cooked and crispy before wrapping. Soggy chicken can ruin the crunchy texture of your Chicken Caesar Wraps.
• Tortilla Temperature: Warming tortillas makes them pliable but don’t overheat! Aim for just enough warmth to prevent tearing during assembly.
• Dressing Drizzle: Use a squeeze bottle for your Caesar dressing. This not only helps with portion control but also avoids over-saturating your wraps, keeping them from getting soggy.
• Lettuce Layering: Add the romaine lettuce last in the assembly process to keep its crunch intact, enhancing the overall texture of your Chicken Caesar Wraps.
• Make Ahead: Prepare the chicken and dressing in advance for quick assembly. Just wrap them up right before serving for the freshest taste!
Make Ahead Options
These Chicken Caesar Wraps are perfect for meal prep enthusiasts looking to save time during busy days! You can prepare the components in advance: cook the chicken tenders and store them in the refrigerator for up to 3 days. Additionally, mix your homemade Caesar dressing and refrigerate it overnight to enhance its flavors. For the freshest experience, assemble the wraps no more than 24 hours before serving; keep the lettuce separate until ready to eat to prevent sogginess. When it’s time to enjoy, simply warm the tortillas, layer your ingredients, and roll them up for a quick, delicious meal that’s just as delightful as if you made them on the spot!
What to Serve with Crunchy Chicken Caesar Wraps?
Enjoying a satisfying meal doesn’t just stop with these delightful wraps; there are plenty of perfect accompaniments waiting to elevate your dining experience.
-
Crispy Sweet Potato Fries: The sweetness and slight crunch complement the savory flavors in the wraps, creating a balanced plate.
-
Zesty Coleslaw: Bright, tangy coleslaw adds a refreshing crunch, enhancing the overall texture while providing a delicious contrast to the warm wraps.
-
Roasted Vegetable Medley: Colorful roasted veggies bring sweetness and a hint of smokiness that pairs wonderfully with the creaminess of the Caesar dressing.
-
Chilled Gazpacho: A refreshing, cold soup with vibrant flavors pairs well with the wraps, providing a light, summery touch to the meal.
-
Garlic Bread Sticks: Fluffy, buttery garlic bread sticks offer an irresistible blend of textures, perfect for dipping in any extra Caesar dressing.
-
Sparkling Lemonade: A fizzy citrus drink cuts through the richness of the wraps, making each bite even more delightful and refreshing.
-
Fruit Salad: A side of fresh fruit adds sweetness and color, balancing the savory flavors with a healthy, vibrant touch that everyone will enjoy.
-
Ice Cream Sundaes: For a sweet finish, serve up some classic ice cream sundaes with all the fixings for a delightful decadent treat after the meal.
Chicken Caesar Wraps Variations & Substitutions
Feel free to get imaginative with these wraps and create a version that speaks to your taste buds!
-
Homemade Chicken: Use your favorite homemade chicken tenders for a fresh flavor boost. This can elevate the dish beyond store-bought convenience.
-
Vegetable Medley: Add sliced tomatoes, cucumbers, or bell peppers for a colorful crunch. Bright veggies enhance both flavor and nutrition, making bites more interesting!
-
Turkey Bacon: Incorporate crispy turkey bacon for a smoky twist. It adds a delightful crunch, perfect for those craving a bit of extra texture.
-
Gluten-Free: Swap out regular tortillas for gluten-free options if you’re watching your carbs. There are excellent gluten-free wraps available that still hold all the goodness together.
-
Creamy Spinach Dressing: Try substituting Caesar dressing with a creamy spinach dip for a twist. It brings a unique flavor profile that will surprise your palate.
-
Spicy Kick: Add jalapeños or a drizzle of hot sauce for heat lovers. A hint of spice can turn an ordinary wrap into a tantalizing treat!
-
Quinoa Swap: Replace romaine with a layer of quinoa for added protein and texture. Quinoa gives a wholesome heartiness to your wrap.
-
Leftover Chicken: Use leftover grilled chicken or rotisserie for a quick variation. It’s a wonderful way to repurpose dinner and save time while cooking!
Elevate your meal experience even further by pairing these wraps with our Creamy Chicken Enchilada Soup or some Chicken Lettuce Wraps for a wonderful spread!
Chicken Caesar Wraps Recipe FAQs
How do I choose the best chicken tenders for my wraps?
Absolutely! For the best flavor, look for chicken tenders that have a crispy, golden coating if you’re using store-bought options. If you’re making your own, I recommend marinating the chicken in buttermilk for a few hours to add moisture and flavor before breading. Fresh chicken tenderloins without dark spots or a slimy texture will yield great results, so keep an eye out for quality!
How should I store leftover Chicken Caesar Wraps?
Very well! Store your assembled Chicken Caesar Wraps in an airtight container in the refrigerator for up to 1 day for the best flavor and texture. If you’re batch prepping, it’s best to keep the dressing separate until you’re ready to enjoy them. This ensures the wraps remain crunchy instead of soggy!
Can Chicken Caesar Wraps be frozen?
The more the merrier! Yes, you can freeze Chicken Caesar Wraps. Start by wrapping each one tightly in aluminum foil or plastic wrap. Then, place them in a freezer-safe bag for up to 2 months. When you’re ready to enjoy them, thaw overnight in the refrigerator. Reheat in the microwave for 1-2 minutes or until heated through! Just make sure to keep the dressing separate until serving to maintain the crunch.
What if my chicken tenders turn out soggy?
Don’t worry, it happens to the best of us! If you find that your chicken tenders are soggy, here’s a troubleshooting tip: Make sure they’re properly cooked and cooled before assembling your wraps. If using store-bought, try baking them for an extra few minutes to enhance crispiness. Consider either frying or baking your homemade ones at a higher temperature to prevent moisture accumulation.
Are Chicken Caesar Wraps suitable for people with dietary restrictions?
Absolutely! You can make them suitable for various dietary needs. For gluten-free options, use gluten-free tortillas and ensure your dressing is gluten-free as well. If someone in your family is vegan or vegetarian, substitute the chicken with chickpeas or grilled tofu, and use a vegan Caesar dressing. Always check ingredient labels for hidden allergens, but this recipe is wonderfully adaptable!
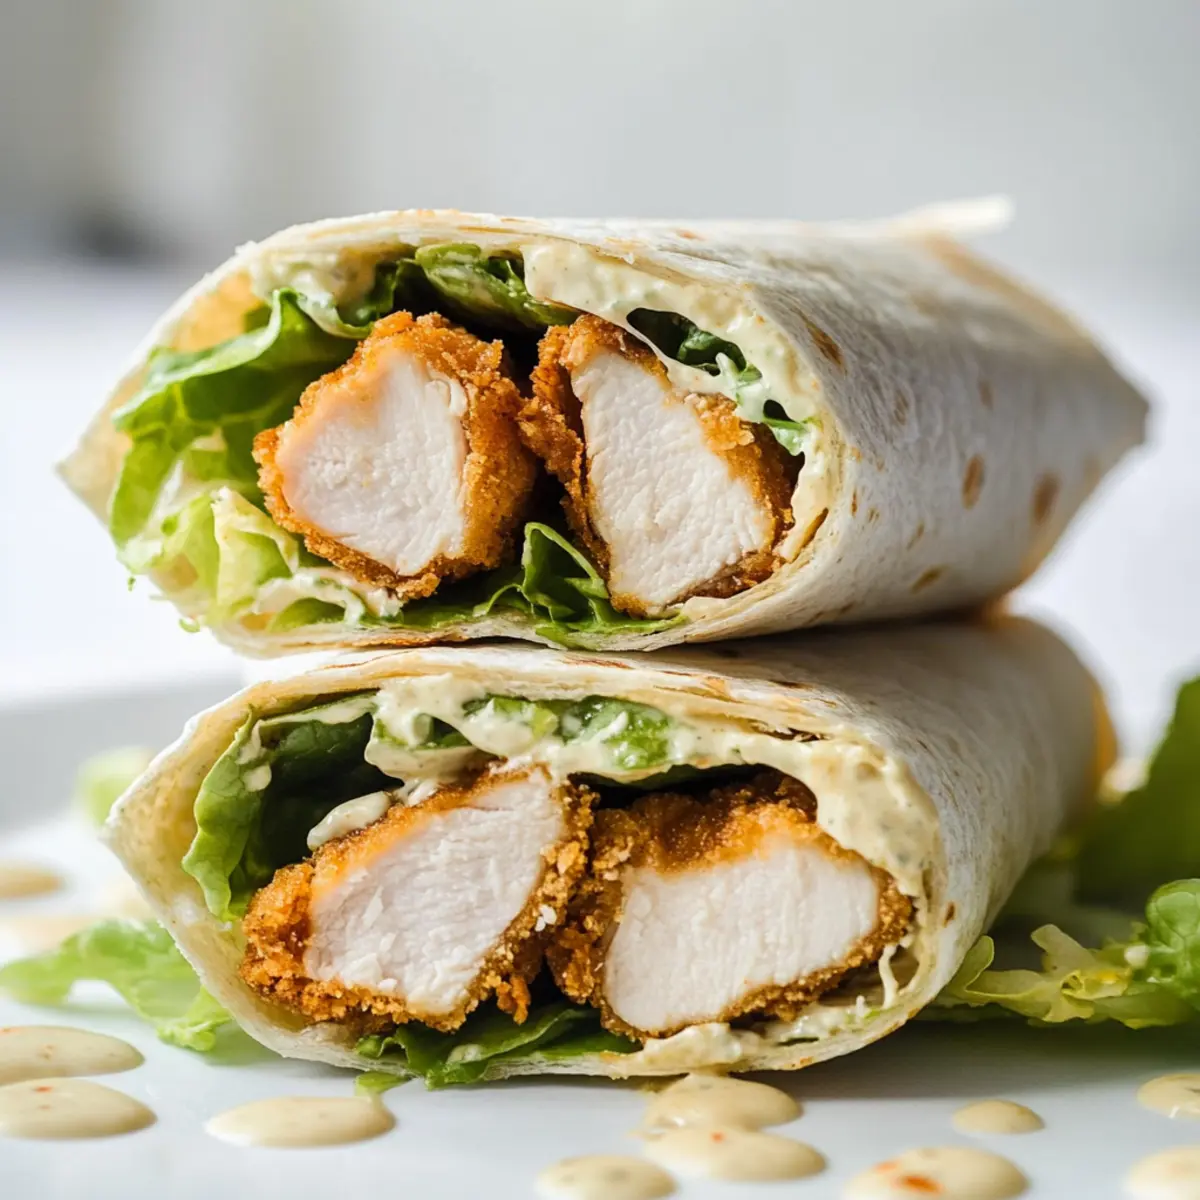
Delicious Chicken Caesar Wraps for a Quick Flavor Fix
Ingredients
Equipment
Method
- If using store-bought chicken tenders, preheat oven according to package instructions and bake until golden brown and crispy, about 20 minutes. For homemade, bread and cook chicken pieces until crunchy, about 15-20 minutes. Let cool slightly.
- Prepare Caesar dressing by whisking together mayonnaise, lemon juice, Dijon mustard, minced garlic, and grated Parmesan until smooth. Adjust seasoning with salt and pepper. For store-bought, measure out and set aside.
- Warm tortillas in microwave for 15-30 seconds or in oven at 350°F for about 5 minutes until pliable.
- On each warm tortilla, layer romaine lettuce, 1-2 crispy chicken tenders, shaved Parmesan cheese, and drizzle with dressing. Distribute ingredients evenly.
- Fold in sides of the tortilla and roll up tightly. Slice in half if desired for easier handling.